Monday, November 4, 2019

Coffee Bar


My husband works from home for two plus years he has been working at desk set up in our bedroom waking up and working in the same room spending most of the day in the same place. He was needing a change of scenery. We did some rearranging to make room for another desk in my craft room. To do this we had to take a dresser that was in there out. It looked a bit odd to have a dresser just hanging out in the living room. I decided then to make it a coffee bar this would free up counter space and I have been forever wanting a coffee bar but had no place for one. While it may be a bit odd to have the coffee bar in the living room I am hoping to someday open it up to the kitchen more and take out the carpet. I hope then it will look more like it belongs.


The dresser had a painted wood surface. I needed it to be a surface that could get wet and could be easily wiped off. I had some shelf contact paper with a marble print and it works perfectly.


Ladder cup rack updated with s style hooks instead of the shower hooks


Friday, October 25, 2019

Halloween Costumes


Halloween is Thursday and my kids still do not have costumes not sure they know what they want to be I think this year we will just be heading to Wal Mart. Usually we make them but this year I am at lack for ideas and energy! Here is a throw back to last years costumes if anyone out there is still looking for ideas!

Minecraft Skeleton costume made from cardboard masking tape and duct tape


Then Dracula the only thing last year made for Dracula was the bow tie the cape was cheaper to buy already made then buying material.


Friday, October 18, 2019

Minecraft birthday cakes


This was a few months ago but I wanted to share the Minecraft birthday cakes I made this year for my boys they both wanted a Minecraft zombie cake I was planning on 1 creeper and zombie but 2 zombies it is and a a block cake just frosted cake cut and stacked with figurines.


Monday, October 14, 2019

Desk makeover

I bought this desk at a yard sale it will be used for a sewing/craft table. It is a little bigger and and more sturdy than the one I am currently using but was in need of a makeover. For the top I sanded off the finish and stained it wit Rust-oleum wood stain in ebony. I then put on a couple of coats of a clear finish using Polycrylic by Minwax I like to use this as a protective coat because it is water based and has low odor.


For the pulls I used black spray paint and for the desk Cowgirl Coral by DIY paint. This paint is a chalk/clay mix it goes on smooth and covers in only 1 or 2 coats and no sanding is required! I bought mine at a local shop that is a distributor for more DIY paints and inspiration visit:

The Withered Barn


Friday, May 24, 2019

Faux Granite Vanity Update


Sorry for the delay in posts. One of my boys had my phone while he was sitting on the toilet and well you can imagine what happened next. So I did not have a phone for a few days to take pictures. I am excited though to share my latest projects.

The first project I have been working on started out as a major Pinterest fail but luckily I was able to fix it with an old method I have used before and I love how it turned out.

So I saw on Pinterest that some people spray painted their counter top it seemed like an easy quick way to update the bathroom vanity so I gave it a try. It turned out to be a mess that didn't cover and just stuck up the whole house even with the bathroom window open and fan going. I do not recommended spray painting indoors! Since spray painting did not work I decided to go back to an old method used before to get a faux granite look. so using white paint, black paint and Minwax Polycrylic I created granite look counter and I also painted the vanity base the same color as my kitchen cabinets (with Behr Classic Silver) the doors and drawers using the custom matched paint by Home Depot that I used to paint my dining room and some other decor items around my house.

Here is a link from a previous post on how to do the faux granite:Another Painted Counter top A few changes though: In the link post 3 colors were used for this counter top though only the white and black were used. Do the white first as a base and layer alternating between the colors. I sprinkled on some glitter between a few of the polycrylic coats doing this between the poly coats instead of paint coats helped it stick better. Also see my post Kitchen Remodel for more inspiration and directions for this project.

Before


After


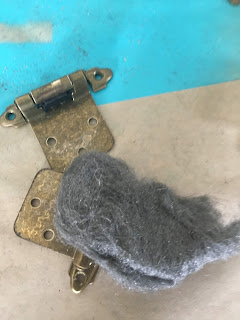
The door hinges were fist sanded with steel-wool then spray painted with Rust-Oleum Forged Hammered Antique Pewter *tip poke screws into cardboard box to spray.

Monday, April 29, 2019

Weekend Adventures


This weekend was for sure not without the struggles we face every weekend where the days seem long and we are tying to figure out what to do and get the kids to go outside and all they want to do is TV or X-box and we all get snappy and grumpy at each other. We did though end up having a pretty good weekend and having a blast! Saturday we spent the morning helping our town with a City Clean up day. We walked along the river and picked up trash. It was a beautiful morning to be outside, but the amount of trash along the river and in it is disheartening and I really wish people would take better care of our earth. When our resources or gone, so are we! The kids did a play X-box some but We managed to get them to go outside and enjoy the sun. Since the sun was shining and so they then think it is just sooo hot and they need a pool, I made a compromise and bought a slip n slide for them to play on instead.


Sunday was the day things seem to go down hill and everyone was just tired and cranky. It end up being a pretty good day once we got outside and enjoyed nature together. The day started out with the kids waking up early and watching TV all morning, this never seems to be a good idea. So when the neighbor kid came over in the afternoon and wanted to play X-box and we said they needed to play outside. This created a spat between him our oldest son and sent him into a horrible mood. Di spite all the grumbling about it, we loaded up the bikes and drove to a beautiful spot not far from our house where we have never been as a family but where husband bikes. We rode bikes on the dirt roads and through the creek and played and splashed in the creek, which my youngest the little water baby thought was just great! He unfortunately took a little spill on our way back to SUV so this wasn't a good way to end the trip. Thankfully thought the crash was not as bad as it looked and he was able to limp away with only some scrapes and bruises on his knee and hands. This was not a good way to end the adventure but we still had a blast and the mountains/hills and creek where so so beautiful and green this time of year.


Riding through the creek


Of Course we had to play in it too


and Lots of just enjoying the beauty of nature

Our Earth such a beautiful place and inside of us it creates beautiful feelings, if you feel down a little fresh air and the beauty of nature can do so much for your soul. Most importantly though if you are feeling down remember there is only one you and that is amazing and that is why you are so loved.

on my Facebook page I have set up donation to The Ocean Cleanup. Keeping our water clean is a good place to start to protect our Earth.


Friday, April 26, 2019

DIY Shoulder Manikin


I have been needing/wanting a display manikin for my neck wraps. They are kind of expensive and I didn't really want to spend the money on one. Last night when I should have been sleeping I had this idea to make one. So using some scrap wood and a hanger and a crochet headband I had made but never finished I made one!

you will need:

long piece of wood 1.5 inches thick (my long one was about 15 inches long)
short piece of wood 1.5 inches thick (I used one about 7.5 inches in length)
velvet hanger
yarn or fabric
spray paint
a screw long enough to attach the boards


You will need to cut your wood pieces to size, mine already happened to be this size so it was what I used.


You will then screw them together with the short one on bottom to create a base


Then Spray Paint I used some black I had in the cupboard and painted on two coats


While your paint is drying wrap your hanger I used a crochet ear warmer headband thing I had made and never finished similar to this one my aunt made that turned out much better:


So if you happen to have one of these around you don't ware use it. If not you could use some material cut to size and glue on hanger or wrap the hanger with yarn. I wraped the corners of the headband arond the sides and bottom of the hanger and used a safety pin to hold it together and on the hanger.


You will then attch the hanger to the base. I tried to nail it on but this happened:


So, I got out the hot glue gun to glue the hanger back together and attach the hanger to the base. some better glue other than hot glue may be better but for now that is what I had available


This makes a perfect display for a hot/cold therapy Comfort Pad